對人工智慧程式設計有興趣的同學,歡迎繼續學習:
[第5單元]Swift 人工智慧程式基礎 https://www.mobile01.com/topicdetail.php?f=482&t=6734952&p=1#86780672
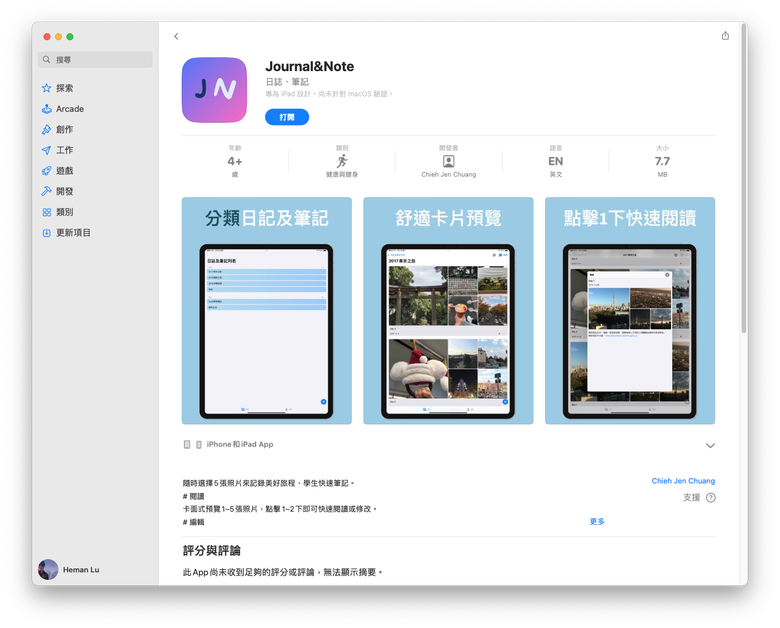
另外,第4單元整合的App也已更新版本,包括 iOS, iPadOS, macOS 三種版本:
動畫與繪圖
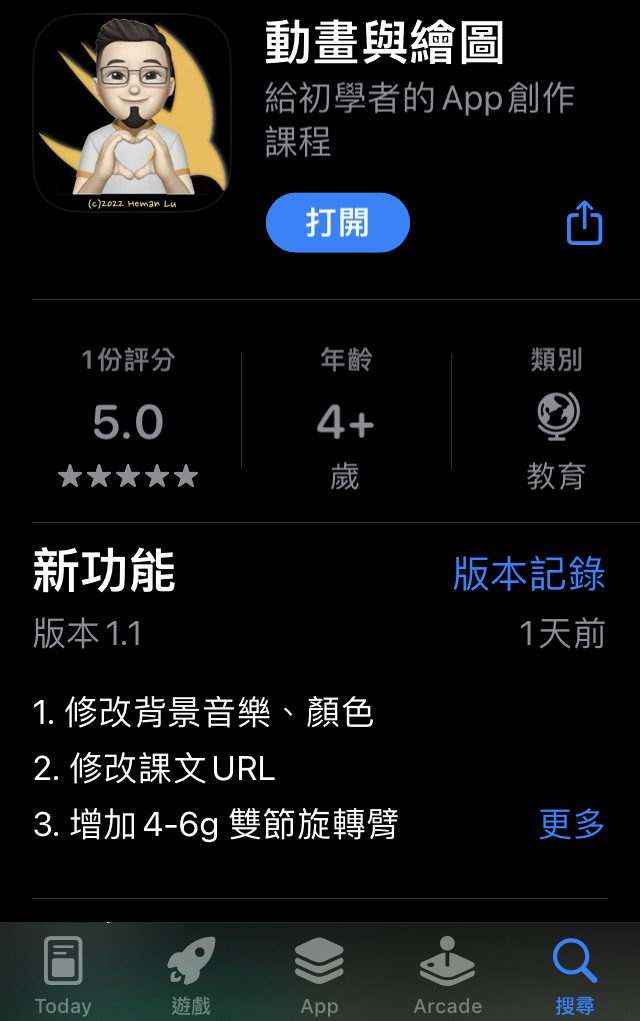 https://apps.apple.com/tw/app/動畫與繪圖/id1642880905 https://apps.apple.com/tw/app/動畫與繪圖/id1642880905
雪白西丘斯 wrote:
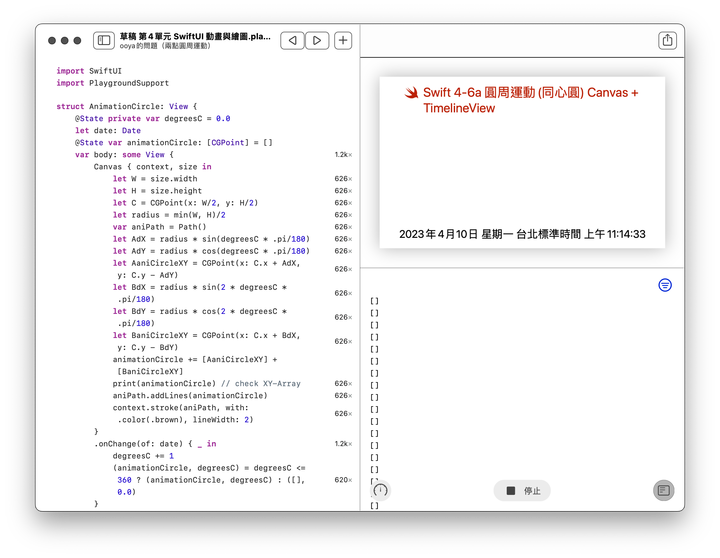
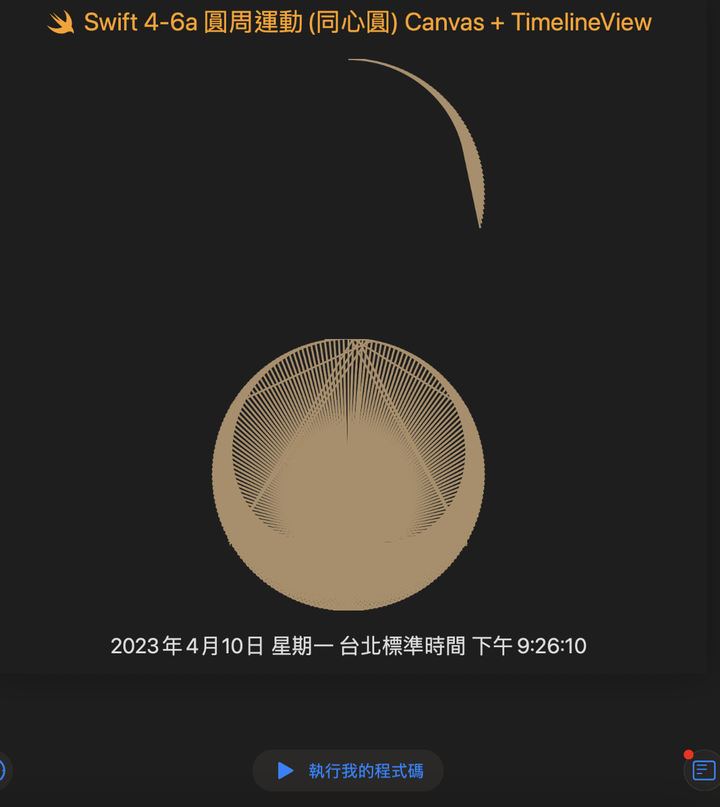
作業圓周運動可以做出...(恕刪)
import SwiftUI
import PlaygroundSupport

struct AnimationCircle: View {
    @State private var degreesC = 0.0
    let date: Date
    @State var animationCircle: [CGPoint] = []
    var body: some View {
        Canvas { context, size in
            let W = size.width
            let H = size.height
            let C = CGPoint(x: W/2, y: H/2)
            let radius = min(W, H)/2
            var aniPath = Path()
            let AdX = radius * sin(degreesC * .pi/180)
            let AdY = radius * cos(degreesC * .pi/180)
            let AaniCircleXY = CGPoint(x: C.x + AdX, y: C.y - AdY)
            let BdX = radius * sin(2 * degreesC * .pi/180)
            let BdY = radius * cos(2 * degreesC * .pi/180)
            let BaniCircleXY = CGPoint(x: C.x + BdX, y: C.y - BdY)
            animationCircle += [AaniCircleXY] + [BaniCircleXY]
            print(animationCircle) // check XY-Array
            aniPath.addLines(animationCircle)
            context.stroke(aniPath, with: .color(.brown), lineWidth: 2)
        }
        .onChange(of: date) { _ in
            degreesC += 1
            (animationCircle, degreesC) = degreesC <= 360 ? (animationCircle, degreesC) : ([], 0.0)
        }
    }
}

struct showAll: View {
    @State private var T = Date()
    var body: some View {
        Label("Swift 4-6a 圓周運動(同心圓) Canvas + TimelineView", systemImage: "swift")
            .font(.largeTitle)
            .foregroundColor(.orange)
            .padding()
        TimelineView(.animation()) { context in
            AnimationCircle(date: context.date)
        }
        Text("\(Date())")
            .font(.title)
            .padding()
    }
}
PlaygroundPage.current.setLiveView(showAll())
雪白西丘斯 wrote:
你原來寫法是不是像這...(恕刪)

ooya wrote:
感謝老師的指導!原本...(恕刪)
import SwiftUI
import PlaygroundSupport
class SaveXY: ObservableObject {
var xy: [CGPoint] = []
}
struct AnimationCircle: View {
@State private var degreesC = 0.0
@StateObject private var saveXY = SaveXY()
let date: Date
var body: some View {
Canvas { context, size in
let w = size.width
let h = size.height
let c = CGPoint(x: w/2, y: h/2)
let radius = min(w, h)/2
var aniPath = Path()
let adX = radius * sin(degreesC * .pi/180)
let adY = radius * cos(degreesC * .pi/180)
let aAniCircleXY = CGPoint(x: c.x + adX, y: c.y - adY)
let bdX = radius * sin(2 * degreesC * .pi/180)
let bdY = radius * cos(2 * degreesC * .pi/180)
let bAniCircleXY = CGPoint(x: c.x + bdX, y: c.y - bdY)
saveXY.xy += [aAniCircleXY] + [bAniCircleXY]
print(saveXY.xy.count) // check two instance saveXY.xt.count
aniPath.move(to: c)
aniPath.addLines(saveXY.xy)
context.stroke(aniPath, with: .color(.brown), lineWidth: 2)
}
.onChange(of: date) { _ in
degreesC += 1
(saveXY.xy, degreesC) = degreesC <= 360 ? (saveXY.xy, degreesC) : ([], 0.0)
}
}
}
struct ShowAll: View {
@State private var T = Date()
var body: some View {
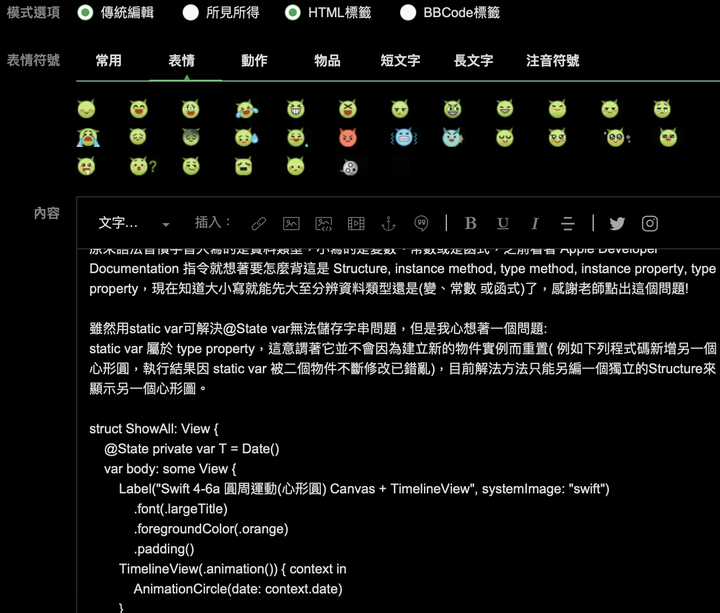
Label("Swift 4-6a 圓周運動(心形圓) Canvas + TimelineView", systemImage: "swift")
.font(.largeTitle)
.foregroundColor(.orange)
.padding()
TimelineView(.periodic(from: Date(), by: 0.01)) { context in
var oneAnimationCircle = AnimationCircle(date: context.date)
oneAnimationCircle
}
TimelineView(.periodic(from: Date(), by: 0.03)) { context in
var newAnimationCircle = AnimationCircle(date: context.date)
newAnimationCircle
}
Text("\(Date())")
.font(.title)
.padding()
}
}
PlaygroundPage.current.setLiveView(ShowAll())
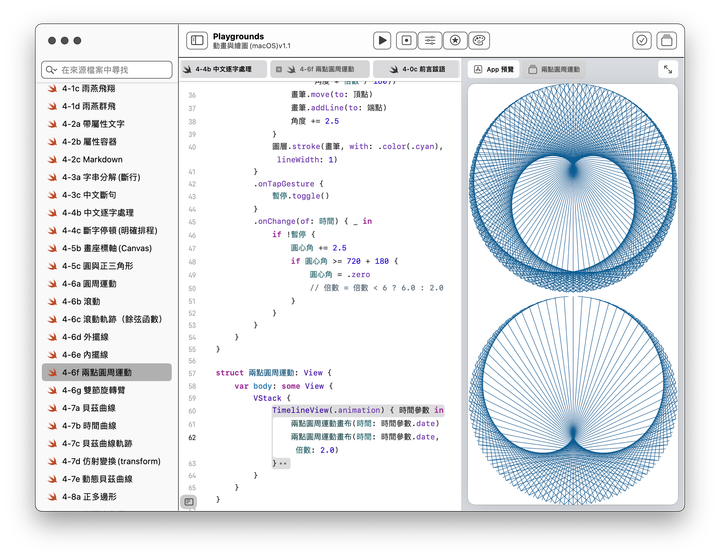
// 4-6f 兩點圓周運動 Canvas + TimelineView
// Updated by Heman, 2022/04/30
import SwiftUI

struct 兩點圓周運動畫布: View {
    let 時間: Date
    @State var 圓心角 = CGFloat.zero
    @State var 暫停 = false
    @State var 倍數 = 1.5
    var body: some View {
        Canvas { 圖層, 尺寸 in
            let 寬 = 尺寸.width
            let 高 = 尺寸.height
            let 中心 = CGPoint(x: 寬/2, y: 高/2)
            let 半徑 = min(寬, 高) / 2

            var 畫筆 = Path()
            畫筆.addArc(
                center: 中心,
                radius: 半徑,
                startAngle: .zero,
                endAngle: .degrees(360),
                clockwise: false
            )
            // 圖層.fill(畫筆, with: .color(.black))

            畫筆 = Path()
            var 角度 = 0.0
            while 角度 <= 圓心角 {
                let 頂點 = CGPoint(
                    x: 中心.x + 半徑 * sin(.pi * 角度 / 180),
                    y: 中心.y - 半徑 * cos(.pi * 角度 / 180))
                let 端點 = CGPoint(
                    x: 中心.x + 半徑 * sin(.pi * 角度 * 倍數 / 180),
                    y: 中心.y - 半徑 * cos(.pi * 角度 * 倍數 / 180))
                畫筆.move(to: 頂點)
                畫筆.addLine(to: 端點)
                角度 += 2.5
            }
            圖層.stroke(畫筆, with: .color(.cyan), lineWidth: 1)
        }
        .onTapGesture {
            暫停.toggle()
        }
        .onChange(of: 時間) { _ in
            if !暫停 {
                圓心角 += 2.5
                if 圓心角 >= 720 + 180 {
                    圓心角 = .zero
                    // 倍數 = 倍數 < 6 ? 6.0 : 2.0
                }
            }
        }
    }
}

struct 兩點圓周運動: View {
    var body: some View {
        VStack {
            TimelineView(.animation) { 時間參數 in
                兩點圓周運動畫布(時間: 時間參數.date)
                兩點圓周運動畫布(時間: 時間參數.date, 倍數: 2.0)
            }
        }
    }
}

import PlaygroundSupport
PlaygroundPage.current.setLiveView(兩點圓周運動())
雪白西丘斯 wrote:
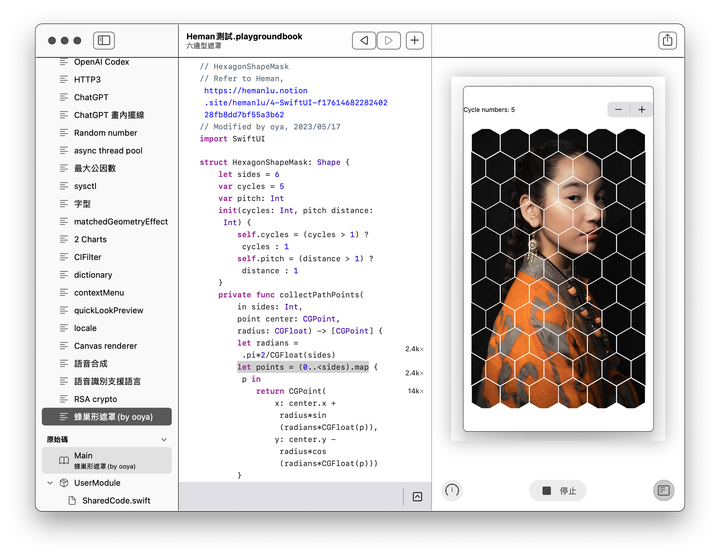
挑戰題:蜂巢形遮罩(mask...(恕刪)
雪白西丘斯 wrote:
挑戰題:蜂巢形遮罩(mask...(恕刪)


// HexagonShapeMask
// Refer to Heman, https://hemanlu.notion.site/hemanlu/4-SwiftUI-f1761468228240228fb8dd7bf55a3b62
// Modified by oya, 2023/05/17
import SwiftUI

import SwiftUI

struct HexagonShapeMask: Shape {
    let sides = 6
    var cycles = 5
    var pitch: Int
    init(cycles: Int, pitch distance: Int) {
        self.cycles = (cycles > 1) ? cycles : 1
        self.pitch = (distance > 1) ? distance : 1
    }

    private func collectPathPoints(
        in sides: Int,
        point center: CGPoint,
        radius: CGFloat) -> [CGPoint] {
        let radians = .pi*2/CGFloat(sides)
        let points = (0..<sides).map {="" p="" in="" return="" cgpoint(="" x:="" center.x="" +="" radius*sin(radians*cgfloat(p)),="" y:="" center.y="" -="" radius*cos(radians*cgfloat(p)))="" }="" points="" private="" func="" collectcenter(origin="" center:="" cgpoint,="" radius:="" cgfloat)=""> [CGPoint] {
        let radians = .pi*2/CGFloat(sides)
        let r = 2*radius
        let centerPoints = (0..<sides).map {="" return="" cgpoint(="" x:="" center.x="" +="" r*cos(radians*cgfloat($0)),="" y:="" center.y="" r*sin(radians*cgfloat($0)))="" }="" centerpoints="" func="" path(in="" rect:="" cgrect)="" -=""> Path {
        let w = rect.width
        let h = rect.height
        let center = CGPoint(x: rect.midX, y: rect.midY)
        let r = min(w, h)/2/CGFloat(sides)
        var centerPoints: [CGPoint] = [center]
        var cycle = cycles
        while cycle > 0 {
            let tempCenterPoints = centerPoints.map { center in
                collectCenter(origin: center, radius: r)
            }
            let _ = tempCenterPoints.map { point in
                if !centerPoints.contains(point) {
                    centerPoints.append(contentsOf: point)
                }
            }
            cycle -= 1
        }

        var path = Path()
        let radians = .pi*2/(CGFloat(6*2 + pitch)) // pitch若為0則內部無遮罩
        let r1 = r / cos(radians)
        for center in centerPoints {
            let tempPoints = collectPathPoints(in: sides,
                                               point: center,
                                               radius: r1)
            path.move(to: tempPoints[0])
            path.addLines(tempPoints)
            path.closeSubpath()
        }
        return path
    }
}


import PhotosUI
//@available(iOS 16.0, macOS 13.0, *)
struct PhotosPickerView: View {
    @State private var photosPickerItem: PhotosPickerItem?
    @Binding var photo: UIImage
    @Binding var sw: Bool

    var body: some View {
        VStack {
            PhotosPicker(selection: $photosPickerItem,
                         matching: .images) {
                Label("Pick a photo", systemImage: "photo")
            }
            .buttonBorderShape(.capsule)
            .buttonStyle(.borderedProminent)
            .onChange(of: photosPickerItem) { item in
                Task {
                    do {
                        if let data = try await item?.loadTransferable(
                            type: Data.self) {
                            if let transData = UIImage(data: data) {
                                photo = transData
                            }
                        }
                    } catch {
                        print("Error!!!", error)
                    }
                }
                sw = true
            }
        }
    }
}


struct ContentView: View {
    @State private var selectedPhoto = UIImage()
    @State private var switcher = false
    @State private var newCycles = 3
    var body: some View {
        PhotosPickerView(photo: $selectedPhoto, sw: $switcher)
            .sheet(isPresented: $switcher) {
                VStack {
                    Stepper("Cycle numbers: \(newCycles)",
                            value: $newCycles,
                            in: 1...6,
                            step: 1)
                    Image(uiImage: selectedPhoto)
                        .resizable()
                        .scaledToFit()
                        .mask(alignment: .center) {
                            HexagonShapeMask(cycles: newCycles, pitch: 2)
                        }
                        .onTapGesture {
                            switcher = false
                        }
                        .padding()
                }
            }
    }
}

struct ContentView_Previews: PreviewProvider {
    static var previews: some View {
        ContentView()
    }
}
</sides).map></sides).map>
ooya wrote:
蜂巢形遮罩挑戰終於成...(恕刪)
// HexagonShapeMask
// Refer to Heman, https://hemanlu.notion.site/hemanlu/4-SwiftUI-f1761468228240228fb8dd7bf55a3b62
// Modified by oya, 2023/05/17
import SwiftUI

struct HexagonShapeMask: Shape {
    let sides = 6
    var cycles = 5
    var pitch: Int
    init(cycles: Int, pitch distance: Int) {
        self.cycles = (cycles > 1) ? cycles : 1
        self.pitch = (distance > 1) ? distance : 1
    }
    private func collectPathPoints(
        in sides: Int,
        point center: CGPoint,
        radius: CGFloat) -> [CGPoint] {
        let radians = .pi*2/CGFloat(sides)
        let points = (0..<sides).map { p in
            return CGPoint(
                x: center.x + radius*sin(radians*CGFloat(p)),
                y: center.y - radius*cos(radians*CGFloat(p)))
        }
        return points

    }
    private func collectCenter(origin center: CGPoint,
                               radius: CGFloat) -> [CGPoint] {
        let radians = .pi*2/CGFloat(sides)
        let r = 2*radius
        let centerPoints = (0..<sides).map {
            return CGPoint(
                x: center.x + r*cos(radians*CGFloat($0)),
                y: center.y + r*sin(radians*CGFloat($0)))
        }
        return centerPoints
    }
    func path(in rect: CGRect) -> Path {
        let w = rect.width
        let h = rect.height
        let center = CGPoint(x: rect.midX, y: rect.midY)
        let r = min(w, h)/2/CGFloat(sides)
        var centerPoints: [CGPoint] = [center]
        var cycle = cycles
        while cycle > 0 {
            let tempCenterPoints = centerPoints.map { center in
                collectCenter(origin: center, radius: r)
            }
            let _ = tempCenterPoints.map { point in
                if !centerPoints.contains(point) {
                    centerPoints.append(contentsOf: point)
                }
            }
            cycle -= 1
        }

        var path = Path()
        let radians = .pi*2/(CGFloat(6*2 + pitch)) //pitch若為0則內部無遮罩
        let r1 =  r / cos(radians)
        for center in centerPoints {
            let tempPoints = collectPathPoints(in: sides,
                                               point: center,
                                               radius: r1)
            path.move(to: tempPoints[0])
            path.addLines(tempPoints)
            path.closeSubpath()
        }
        return path
    }
}

import PhotosUI
//@available(iOS 16.0, macOS 13.0, *)
struct PhotosPickerView: View {
    @State private var photosPickerItem: PhotosPickerItem?
    @Binding var photo: UIImage
    @Binding var sw: Bool

    var body: some View {
        VStack {
            PhotosPicker(selection: $photosPickerItem,
                         matching: .images) {
                Label("Pick a photo", systemImage: "photo")
            }
            .buttonBorderShape(.capsule)
            .buttonStyle(.borderedProminent)
            .onChange(of: photosPickerItem) { item in
                Task {
                    do {
                        if let data = try await item?.loadTransferable(
                            type: Data.self) {
                            if let transData = UIImage(data: data) {
                                photo = transData
                            }
                        }
                    } catch {
                        print("Error!!!", error)
                    }
                }
                sw = true
            }
        }
    }
}


struct ContentView: View {
    @State private var selectedPhoto = UIImage()
    @State private var switcher = false
    @State private var newCycles = 3
    var body: some View {
        PhotosPickerView(photo: $selectedPhoto, sw: $switcher)
            .sheet(isPresented: $switcher) {
                VStack {
                    Stepper("Cycle numbers: \(newCycles)",
                            value: $newCycles,
                            in: 1...6,
                            step: 1)
                    Image(uiImage: selectedPhoto)
                        .resizable()
                        .scaledToFit()
                        .mask(alignment: .center) {
                            HexagonShapeMask(cycles: newCycles, pitch: 2)
                        }
                        .onTapGesture {
                            switcher = false
                        }
                        .padding()
                }
            }
    }
}

import PlaygroundSupport
PlaygroundPage.current.setLiveView(ContentView())